When it comes to open source blogging, WordPress is all that strikes our minds. Right from its emergence, WordPress has acknowledged to be a successful blogging platform, which is used by several millions of users. One best thing about WordPress attracted by most users is the photo gallery option that comes along with it. WordPress has a plethora of photo gallery extensions and plug-ins which are unique in their own way. Whatever be the photo gallery plugin you use for your WordPress site, in this post you’ll find some necessary tips to customize your WordPress photo gallery effectively.
You may be interested in the following modern trends related articles as well.
Please feel free to join us and you are always welcome to share your thoughts even if you have more reference links related to other tips and tricks that our readers may like.
Don’t forget to
subscribe to our RSS-feed and
follow us on Twitter — for recent updates and follow us on Google+
.
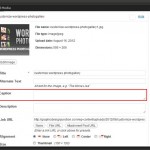
Use Image Captions:

Use Image Caption
Using captions for images are a better way to let people know about the image prior to clicking it. Image captions play a vital role in recognizing the photographer or artist. You can click on the image gallery placeholder and then on the edit icon that appears on the top left corner to add the caption. There is a ‘show’ link at the right of the image where you can insert text in the caption box.
Upload multiple images:

Another best way to customize your WordPress photo gallery is by attaching multiple images to your page. For this you can directly click on ‘upload from computer’ option. Having uploaded at least two images on your page or post, click on ‘save all changes’ button. You will now see a Gallery tab from where you can configure your gallery settings.
Change Thumbnails Order:
Changing the order of thumbnails keeps your page’s look away from the default look. You can simply drag an image from the image list in the gallery window and drop the image where ever you want. If there is no such feature for drag and drop, you can just insert numbers in the boxes for each image.
Change Thumbnails Size:
Changing or decreasing thumbnail size can give your page an elegant look. With more space, your page looks pleasing. For changing thumbnails size, click ‘settings’ option in the left navigation and then select ‘media’. Just make sure that the size you select suits your page.
Change number of columns:
You can customize your gallery by changing the number of columns appearing in the photo gallery.
Gallery Columns:
With a gallery column option, you can select the number of columns of thumbnail images you have in your photo gallery.
Images order:

There are options like menu order, title, date/time, and random from where you can configure your page. Menu order option lets you to gather the thumbnail images in whichever order you wish to have. You also have ascending and descending options that
allow you to reverse the previously selected orders.
While these are few options to get your WordPress photo gallery customized, you can also make changes to your gallery anytime by changing your gallery settings by clicking on the gallery placeholder.
WordPress Photo Gallery Example:

-
- Use Image Caption
Author Bio:
Riya Sherin is a designer who has a love for creativity and enjoy experimenting with various techniques in web. Her speciality is designing wordpress and develops with best design reviewing. You can follow her on Facebook fan page.

")


[…] Design Junction published a post How To Customize WordPress Photo Gallery Effectively When it comes to open source blogging, WordPress is all that strikes our minds. Right from its […]
[…] How To Customize WordPress Photo Gallery Effectively […]