Photography is rare among the fine arts, since it has remained relevant even throughout our advancement into the digital age, due to our love of beautiful photos. But how should you approach creating a ‘perfect’ photo? Here are fifteen possible ways to release your inner master photographer. ![]()
Rule Of Thirds
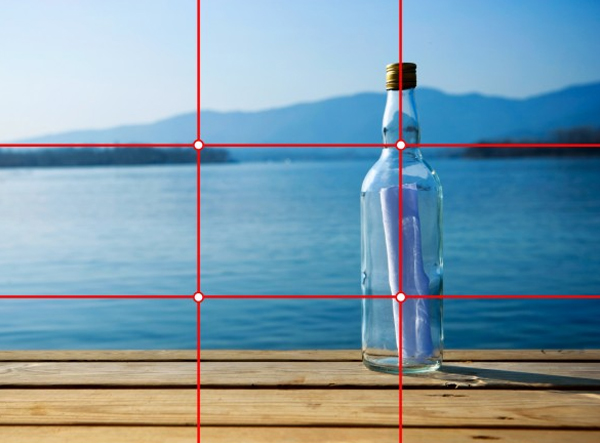
First of all, keep in mind this classic rule of photography, which is simple to understand and utilize. Imagine a grid running across your image – many modern cameras will have the option to superimpose this onto the image as you are taking it – which separates it into nine equal sections.
If you want something to pop out as an interesting part of your image, it should be placed on one of the grid lines, or where the grid lines cross over and come to a point. This is a sure-fire way to make sure the important features of your photo are noticed instantly.
Balancing Elements

However, while the Rule Of Thirds may lead to features being highlighted, it’s not the only technique you need to create an outstanding photo, since it can leave vast chasms in your image which look unprofessional.
Therefore, balancing the elements of your image (including other features at different parts of the image) can create a more polished image which is aesthetically appealing and not too empty-looking.
Simplify the scene

Despite that being an excellent technique, it can lead to cluttered images if you overdo it. A few features are all that is needed, and the secondary items in the image shouldn’t be over-complicated (contain too many details or colors). This can draw the viewer’s eye elsewhere and ruin the focus of your photo, which will be devastating if it is a purposeful image – for a blog or Instagram post, or a promotional image for your website.
So, keep secondary features minimal and simple, and make sure that you appreciate the image as a whole, since the camera will see and capture everything within its lens – not just what you’re pointing it at.
Fill The Frame
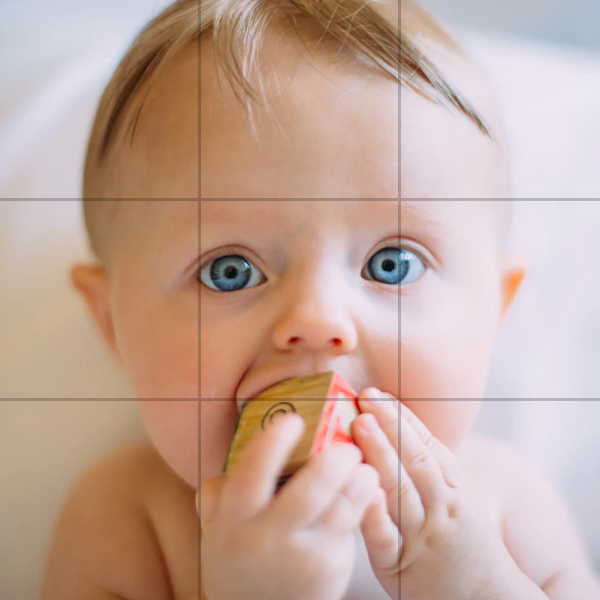
If you still have empty space within your photograph, there is another solution. Your problem may be that you haven’t focused in on your subject by zooming enough or getting close enough to whatever you are photographing – both these techniques, when used properly, can help you to fill the frame of your photograph. Make sure that the subject is large enough to be noticed, and clearly looks like it should be the main focus of the photograph.
“Not filling the frame enough is one of the most common mistakes I see in amateur technology blogs, when they attempt to add images to their posts with far too much empty space,” Jamie Hilton advises, an experienced tech blogger from LuckyAssignments, “it makes viewers confused and not sure where to look.”
Aspect Ratio

This is not only in regards to portrait or landscape images – obviously, portrait would be more suitable for closer shots of people, and landscape should be for wider imagery shots – but also the actual frame of the image within those two categories.
For example, the subject of your photo may fit better into a square frame, which some cameras and even iPhone’s have options to switch to, making the overall image look better since it fits what you are trying to photograph, demonstrating a good understanding on your part of what you’re focusing on. For cinematic shots, a 16:9 ratio (widescreen) would be suitable since it gives the desired ‘film’ effect.
Avoiding The Middle

Utilizing the Rule Of Thirds may lead you to want to always position your subject near the middle of the photograph – however, this is a beginner’s mistake which you should avoid.
Centralized subjects require a certain set of circumstances, and most photos benefit from still keeping to the Rule Of Thirds but highlighting their subjects by placing them at crucial points to the left and right of photos. Using this general guideline, you will quickly be able to enhance the staging of your photos.
Leading Lines

Lines have the incredible ability to lead the viewer’s eye wherever they go – when you look at a picture, you will be subconsciously drawn to follow the line, and expert photographers use this to their advantage. Lines allow you to manipulate how the viewer sees the photo, and what they are drawn to – roads are good examples, as are streams and rivers.
People naturally follow lines to see where they lead, so you can utilize this and put the focus of your image in a place which the line leads to, or even have the line as the focus of your image.
Use Diagonals

Your image may need to be dramatic and suggestive of action to draw the attention of the viewer, or fit into the theme of the purpose of the image – for example, a photo of cars may need to suggest speed and competition. Vertical and horizontal lines do not lend themselves easily to this, so introducing diagonals to your photograph will help immensely.
Wider shots and tilting can introduce a wider perspective, which may pull diagonals into the picture naturally, but, if your shot requires artificial diagonals, you can use the ‘Dutch Tilt’ technique, where you tilt the camera while pressing the button to take the picture – however, this technique doesn’t work for every photograph, so it should be considered on a situation-by-situation basis.
Space To Move
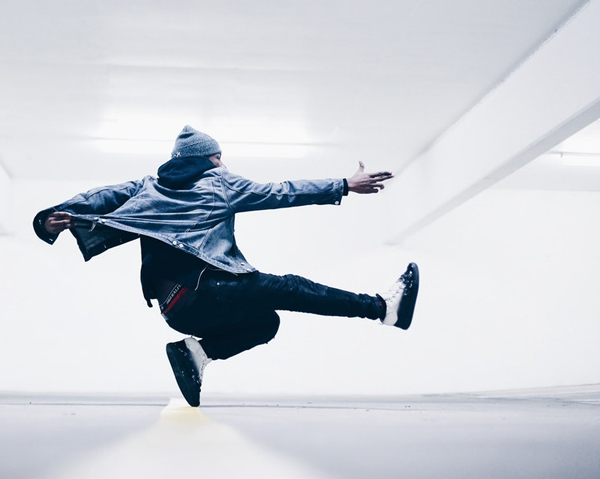
Furthermore, if you really require the illusion of motion, and the focus of your image is an object or person which should be moving, then leaving some space in front of them is vital. They need a space to move into, even though the image won’t actually show them doing it – this is left to the viewer’s imagination, so your positioning needs to allude to it.
Leaving space in an image also works for portraits, usually of people – if their eyes are focused off into the distance, then the viewer needs to see some area of relative emptiness where they could be looking. This is all about giving the viewer an impression, and is essential for purposeful photographs.
Backgrounds

In order to utilize many of the techniques listed above, you will have to take the background of your photo into consideration. A cluttered photo is usually the result of a ‘noisy’ background, where there is a lot going on which may distract the viewer from the main focus of the photo. Choosing a relevant but fairly simplistic background is essential, and can make or break a flawless photo.
Creativity With Colors

While contrast can be great, in order to attract the viewer’s gaze instantly, it is not the only way to be creative with the color scheme of your photo. Even photographs with colors of the same type (a range of yellows in a desert-themed picture, or blues in a water-focused picture) can be interesting, so long as you take care to remove any unwanted colors from the frame of your photo – make sure that all the colors compliment each other, and look suitable and presentable, and you’re ready to take an awesomely-colored picture.
Breaking The Rules

However, while you are in the midst of all these rules, don’t forget that the best photography is unique. While following guidelines is all well and good, the ultimate photo can only be achieved by selectively breaking photography norms, like placing a particularly noticeable main focus in an off-kilter position if it looks astounding and works with the rest of the picture – don’t let your creativity be stifled by what everyone else has done before you!
Center Your Subject
Sometimes, centering a subject works in your favor because of the situation within the photo. For example, a portrait shot where the main focus (presumably a person) is in the center and the background does not distract from them, with a fairly zoomed in focus and good framing, can work for some pictures, and make them stand out.
You need to take the initiative as a photographer and work out what is best for an individual photo, and, when the circumstances are right, centering the subject can be the best option to make sure the viewer is absolutely focused on it.
Cropping
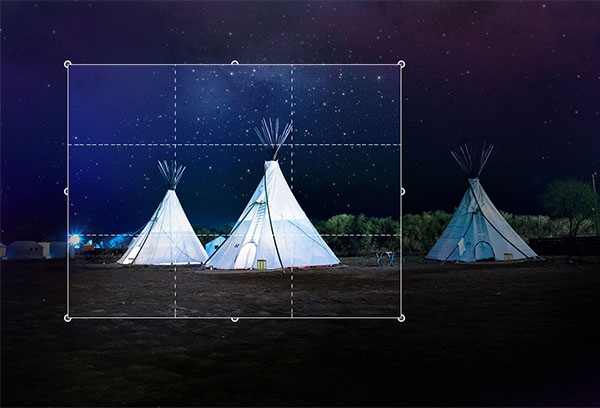
Making sure that the viewer knows where to look is essential, so what better way could you achieve this than taking away parts of the image which are too ‘noisy’ and detail-rich? Cropping allows you to quickly remove these parts and centralize the focus of the photograph, making it immediately clear to the viewer where to look, so that they don’t get confused.
Symmetry And Patterns

Aesthetically, keeping symmetry and patterns in place is beautiful, since it compliments the way the human mind works and will certainly mesmerize your viewer. This could be repeating shapes or colors, or even something as simple as a mirror image.
However, breaking symmetry and patterns does draw the viewer’s attention, since their eyes instantly notice the halt in what they perceive as ‘normal’ within the photograph – what should be there. This could be utilized by having a focus break the symmetry or patterns within a photograph, instantly drawing the viewer’s eyes to it.


