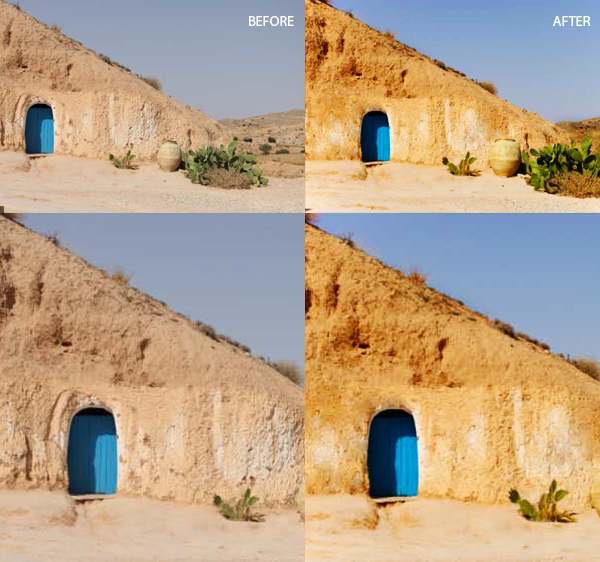
In this Tutorial, you will learn how to retouch photos professionally in Photoshop. This is an easy to follow, step-by-step tutorial for beginner/intermediate users of Photoshop. It features tools applicable to different kinds of photographs, and shows how to achieve a professional, but realistic outcome.
Final Result:
You may be interested in the following modern related articles as well.
- Free Corporate Branding PSD Template
- 30 Fresh Examples of Mobile Apps with Circular Vibe
- 30 Amazing Photo Manipulations by Creative Designers
- Illustrator Tutorials: 23 New Tutorials for Create Vector Graphics
Unlimited Downloads
Over 1,500,000+ Fonts, Mockups, Freebies & Design Assets

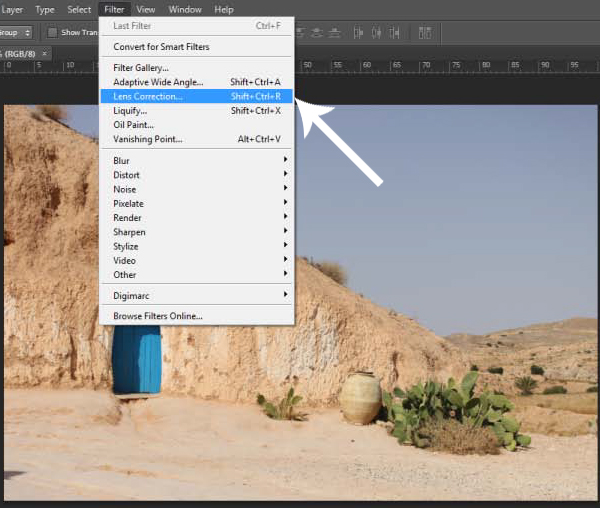
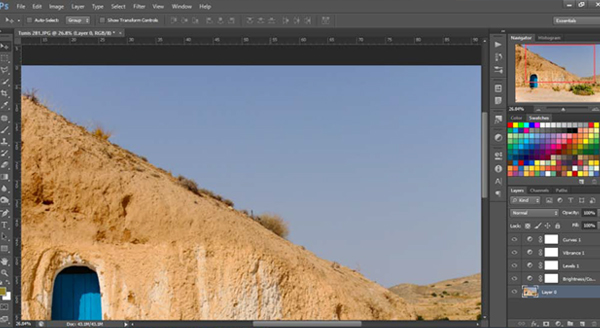
Step 1
Before we start retouching the photo directly, we need to fix any issues with the basic framing of the shot. To do this, go to Filters > Lens Correction.
Step 2
A new window will open — make sure the Straighten Tool is selected on the left-hand side. In the photo, find a straight line that’s either completely vertical or horizontal (for horizontal values it’s usually a line of horizon, for vertical values it can be a human figure or a lamp post). Draw a straight line along it to straighten to photo. I drew it alongside the doors.
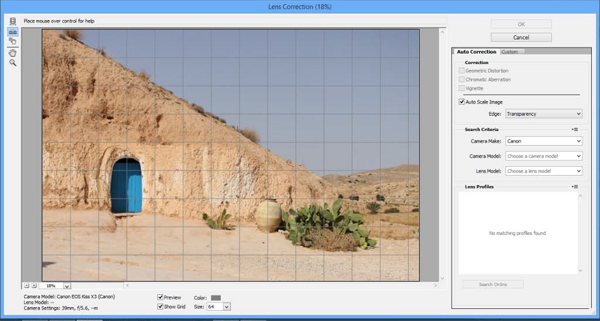
Step 3
To remove any vignette that might have appeared when the photo was taken (or to add some if you’re aiming for a retro effect) go to Custom section and move the Vignette slider.
This is also a place where you can fix any distortion or perspective issues, but this photo doesn’t have any of those, so there’s no need to fiddle with any of them.
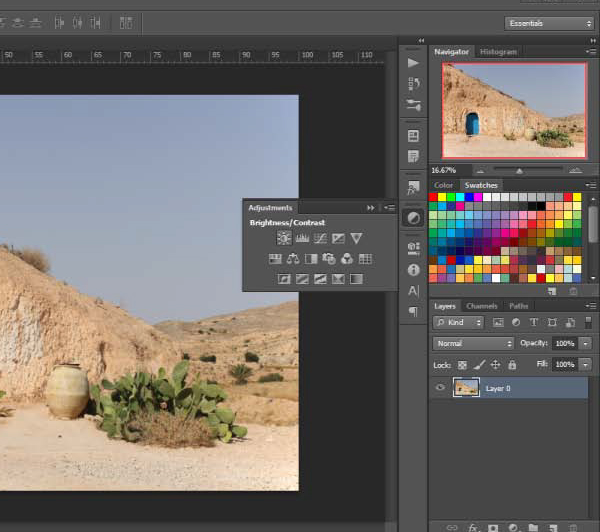
Step 4
After you’ve made any necessary lens corrections, you can proceed to general Adjustments. You can do this by going to Image>Adjustments or through an Adjustments window (Window>Adjustments). Adjustments create a separate layer for each change, not affecting the photo directly; this way you can switch them on and off as needed or delete just some of them. Any changes done through Image>Adjustments will be permanent, though.
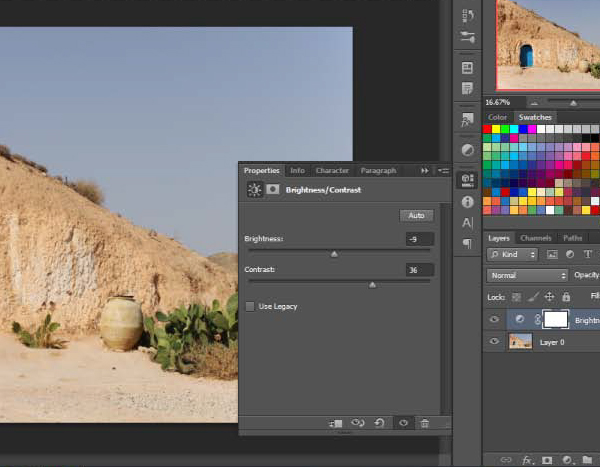
Step 5
To make this photo a bit more dynamic, I will increase the Contrast values in the Brightness/Contrast section of Adjustments window. In order not to over-expose the photo, I will lower the Brightness value. If your photo wasn’t taken in bright light, you might not have to do this, or if it the photo is dark to start with, you might want to increase the brightness.
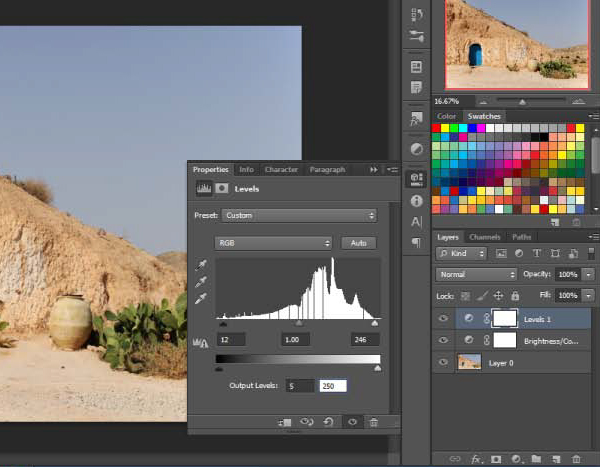
Step 6
Typically, photos have a range of level values from the darkest black to the lightest white. If the photo you’re retouching doesn’t (like the case is here), move sliders to the part where the graph starts rising. If this photo will be used in print, change output levels to 5 and 250. This way you’ll avoid any solid black or white patches, which will result in a more visually pleasing photo.
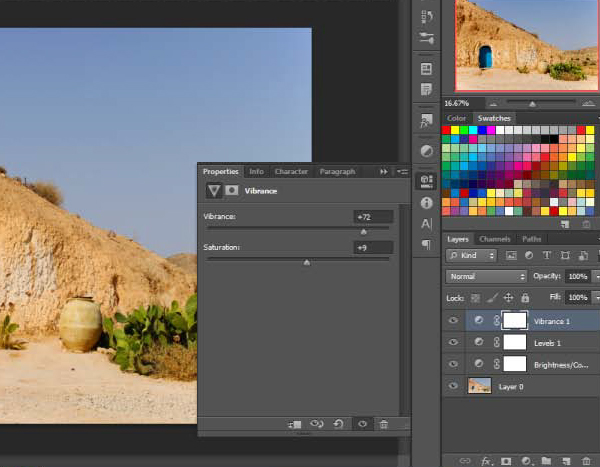
Step 7
Vibrance/Saturation section will help you liven up the colours. Move the sliders until you reach the desired effect, but be careful with the saturation unless you’re aiming for a fluorescent effect.
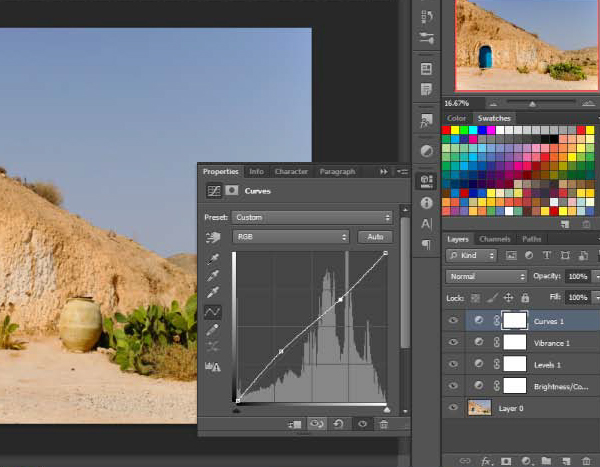
Step 8
The Curves section will help you control colour and brightness values for different parts of the photo. Values are shown from dark to light, left to right. For example, if you’d like to make shadows a bit lighter move the RGB curve a bit up on the left side of the graph. If you’re after a more dramatic effect move the left part down and the right part up – it will give you a stronger contrast than using the Brightness/Contrast option.
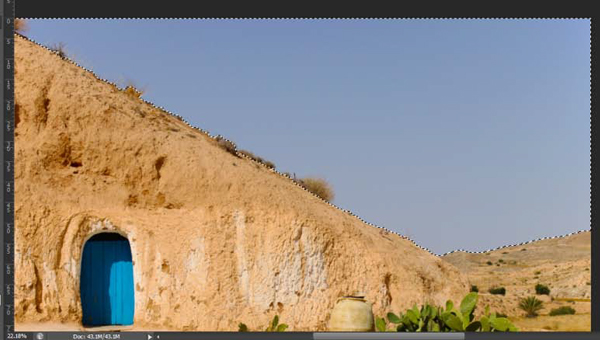
Step 9
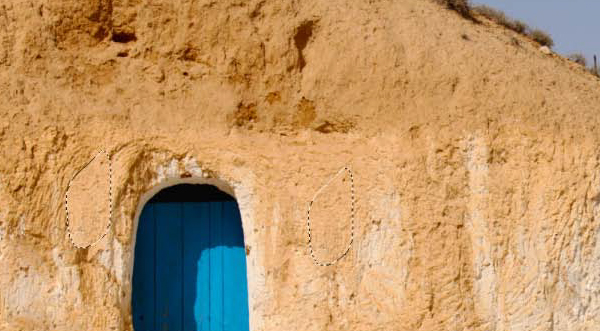
To remove the noise (grains) from the sky, select the Quick Selection Tool and select the affected area. If the edges of the affected area are straight, you can use a Polygonal Lasso Tool, but if you have a more uneven edge, like these patches of grass for example, you’ll need to do it differently.
Step 10
After roughly selecting the affected area, click on the Refine Edge button in the top menu bar.
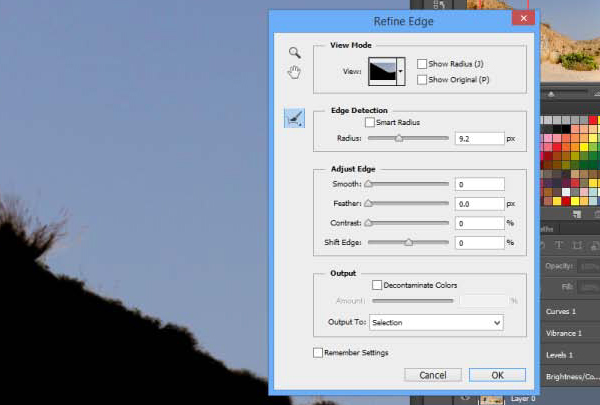
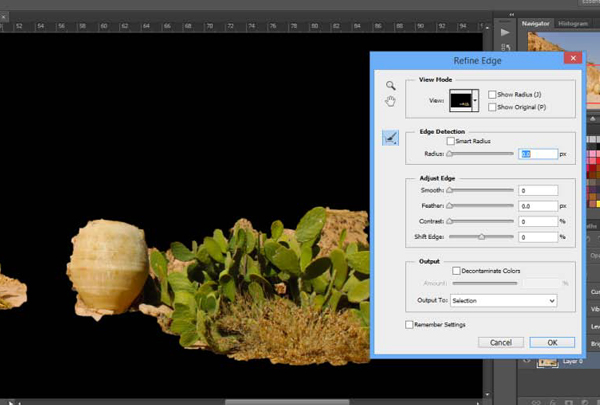
Step 11
A new window like this will open. Choose the View Mode that works best with colours in the photo (I’m using black as it’s a good contrast in this case) and the radius of the brush (larger radius for a larger photo, smaller one for better precision). Draw alongside the edge loosely. You’ll notice that once you’re done drawing Photoshop cleverly masks the area you need masked. Once you’re satisfied with the selected area click OK.
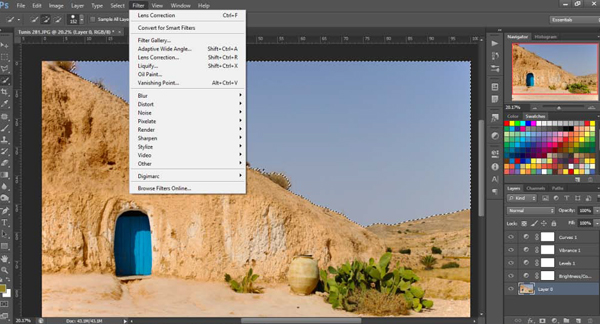
Step 12
Now the sky area is selected, go to Filters>Blur>Gaussian Blur to reduce the noise.
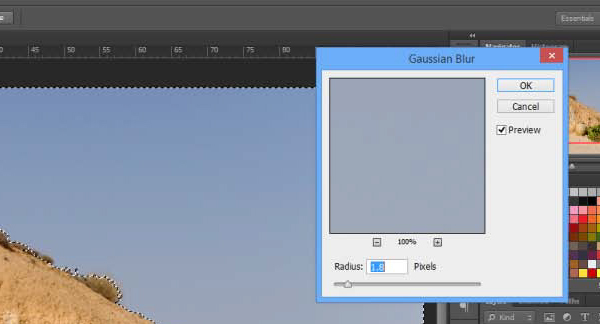
Step 13
A new window will open. Depending on how grainy the photo is, you might not have to apply a lot of blur to it. The smaller the blur radius, the better preservation of the original colours (and subtle gradients).
Step 14
Now we can proceed to fixing any aesthetic issues there might be with the photo. There are some gaps in the paint on the wall that I will remove with the Patch Tool. Loosely select the area you need to patch and drag it to the area you’d like to copy. It will copy the texture, but keep the colours, resulting in a natural look. This is a very useful tool for removing blemishes in portraits, or unwanted elements from photos in general.
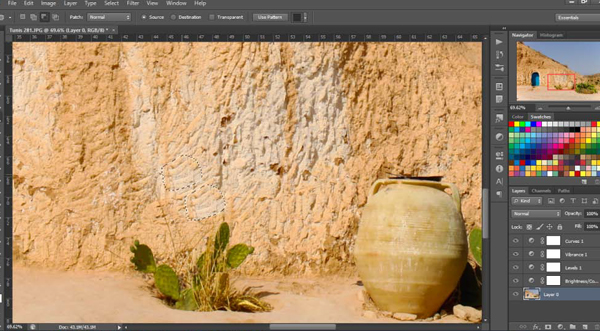
Step 15
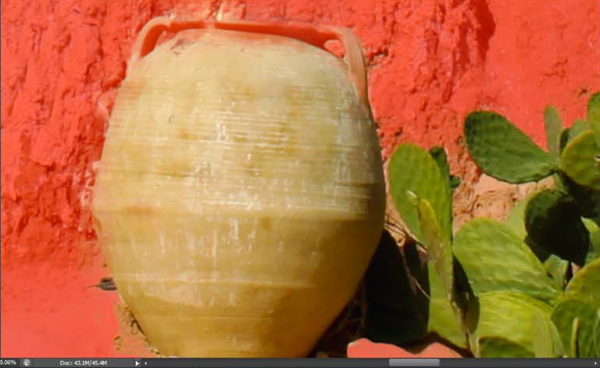
I decided to have the wall as undamaged as possible as a contrast to the rough top part of the hill.
Step 16
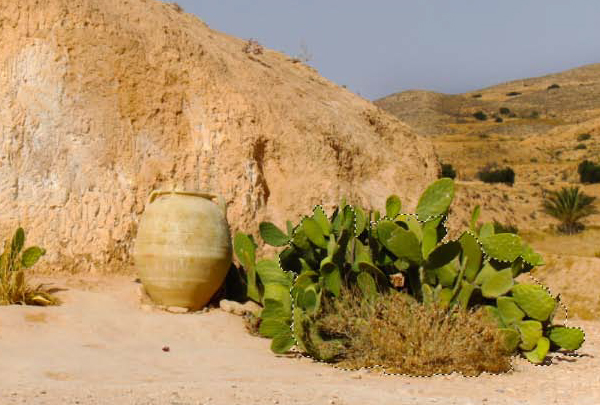
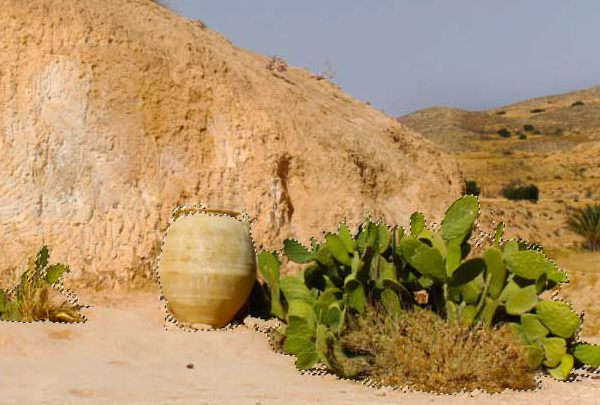
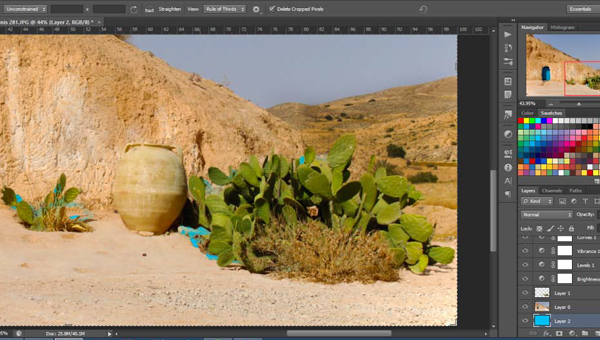
If the resolution of the photo is large enough, and there’s an aspect of it you’d like to emphasise, you can enlarge it to make it more prominent. For example, enlarging this cactus and a clay pot won’t affect the overall balance and realism of the photo, but it will make the photo more dynamic and interesting.
Start by selecting the area in the same way you did with the sky (Quick Selection Tool).
Step 17
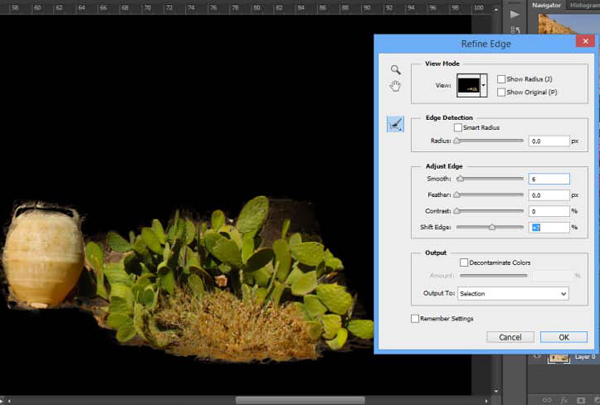
Go to Refine Edge Menu (same as before)
Step 18
If the colours of the elements are too similar, Photoshop might have trouble separating them. In this case, do what you can using the Refine Edge option, and the rest of it you can fix manually using masks in the next step.
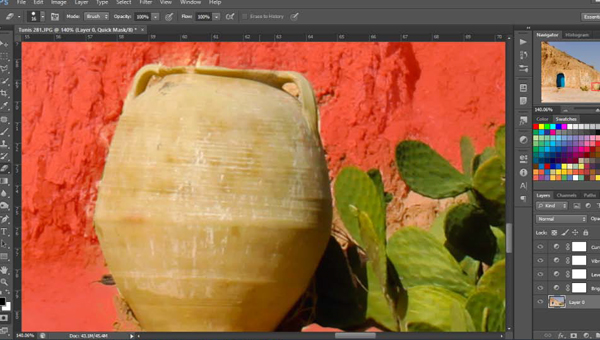
Step 19
QuickMask mode is accessible through a button on the left hand side, underneath the Foreground/Background colours.
Step 20
The mask is shown as a red area. You can use the brush to extend it, and the eraser to remove it.
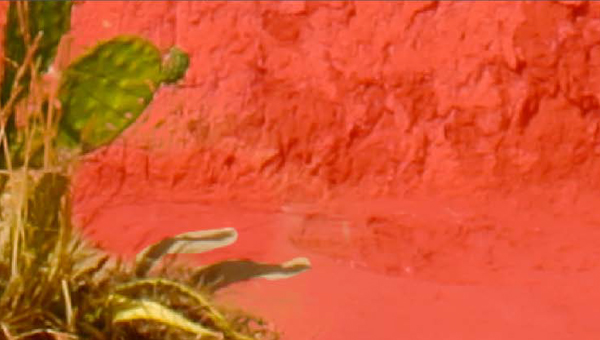
Step 21
Use the eraser to remove the mask from the area you don’t want affected (in this case a pot).
Step 22
Make sure to keep any shadows that relate to the object you want to extract. Keeping shadows will make it look more realistic.
Step 23
Leave the QuickMask mode by clicking on the same button you did to enter it. Right click the selected area and go to Layer via Cut. This will extract it to a separate layer.
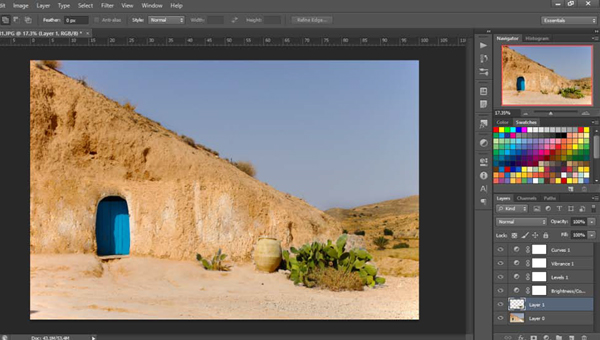
Step 24
Scale the background down. You can do this either by holding Ctrl+T or going to Edit>Free Transform.
In order to move the extracted elements closer to the holes they left, select the separate parts using a Marquee Tool and drag and drop while holding Ctrl.
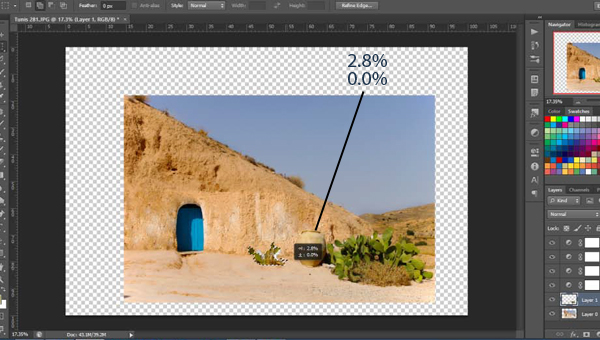
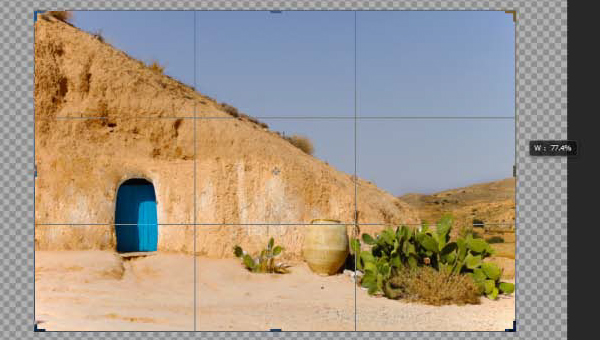
Step 25
Crop the canvas to fit the new photo size using the Crop Tool.
Step 26
In order to see any blank patches clearly, create a new layer behind the existing ones and apply some bright colour to it.
Step 27
Using the Stamp Tool, patch the background up. Find a similar area to the one that’s missing, click on it while holding Alt key, then paint onto the empty area. Use soft brushes for seamless edges.
When retouching photos, aim for a subtle and natural look. The end result should look nice, but no-one should be able to guess you did any retouching.
Final Result
")


[…] How to Retouching Photos in Photoshop Tutorial […]
[…] Photoshop Tutorial: Retouching Photos in Ten Minutes or Less […]
[…] retouching the photo directly, we need to fix any issues with the basic framing of the shot. Continue Reading Advertisements Author: Team Member Being a member of team, I really enjoying my work. […]
[…] How to Retouching Photos in Photoshop Tutorial […]
[…] the creative designing, manipulating and retouching photos tips and tricks with amazing Photoshop tutorials, each Photoshop tutorial is helpful for beginner […]
[…] the creative designing, manipulating and retouching photos tips and tricks with amazing Photoshop tutorials, each Photoshop tutorial is helpful for beginner […]
[…] the creative designing, manipulating and retouching photos tips and tricks with new tutorials, each tutorial is helpful for beginner and advanced users. All […]